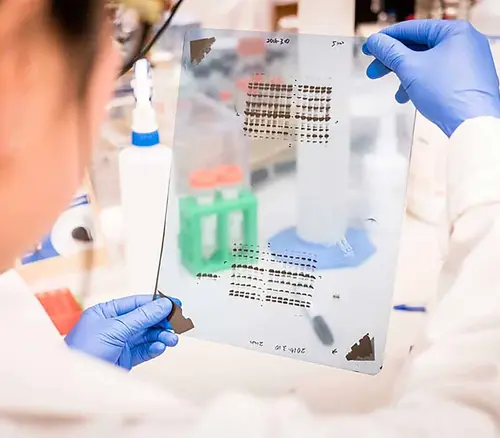
Western blotting remains an indispensable technique in cell biology and cancer research, serving as a gold standard for quantifying protein expression and evaluating targeted signaling pathways. However, despite its routine use, obtaining clean, quantifiable, and reproducible blots can often feel like more of an art than a science. Small inconsistencies during sample preparation, electrophoresis, transfer, or antibody incubation can drastically impact your signal-to-noise ratio.
Having run countless blots to analyze protein expression and cell signaling mechanisms in cancer models, I have compiled a practical guide on troubleshooting the most common Western blotting issues, starting right from protein extraction down to chemiluminescent or fluorescent detection.
1. Protein Extraction & Sample Preparation
A successful Western blot begins long before loading the polyacrylamide gel. Poor sample preparation directly leads to degraded bands, non-specific background, or inconsistent loading.
Issue: Weak or Missing Bands
- Root Cause: Incomplete cell lysis or protein degradation prior to loading.
- Optimization:
- Always keep samples on ice during the extraction phase and use fresh protease and phosphatase inhibitor cocktails in your lysis buffer (e.g., RIPA or SDS-based buffers).
- Ensure adequate sonication or mechanical disruption to fully release nuclear or membrane-bound proteins.
- Measure protein concentration accurately using a BCA assay rather than relying on cell counts alone.
Issue: Smearing or High Molecular Weight Aggregates
- Root Cause: Incomplete protein denaturation, DNA contamination, or sample overloading.
- Optimization:
- Add fresh reducing agents (such as DTT or β-mercaptoethanol) to your loading buffer to fully break disulfide bonds.
- Heat samples at 95°C for 5–10 minutes (or 70°C for 10 minutes for multipass membrane proteins to prevent aggregation).
- Treat lysates with benzonase or perform brief sonication to shear genomic DNA that causes high sample viscosity.
2. Gel Electrophoresis & Membrane Transfer
Even with pristine lysates, poor separation or transfer efficiency can compromise your final image.
Issue: “Smiling” Bands or Uneven Migration
- Root Cause: Overheating during electrophoresis, buffer exhaustion, or salt concentration discrepancies between lanes.
- Optimization:
- Run gels at a constant voltage in an ice bath or at 4°C if running at higher voltages.
- Desalt samples if high ionic strengths are present, and ensure equal total volume and buffer composition across all lanes (including empty lanes loaded with 1X sample buffer).
Issue: Incomplete Protein Transfer
- Root Cause: Suboptimal transfer time, incorrect voltage, or inappropriate pore size.
- Optimization:
- For high-molecular-weight proteins (>100 kDa), add 0.05–0.1% SDS to the transfer buffer and reduce methanol content to 10% to facilitate exit from the gel.
- For small proteins (<20 kDa), use a 0.2 µm PVDF/NC membrane instead of 0.45 µm to prevent over-transfer (“blow-through”).
- Always verify transfer efficiency using Ponceau S staining prior to blocking.
3. Blocking & Antibody Incubation
The interaction between your target protein and primary antibody dictates the specificity and clarity of your signal.
Issue: High Uniform Background
- Root Cause: Inadequate blocking or dry membrane during processing.
- Optimization:
- Test different blocking agents: 5% non-fat dry milk is ideal for most applications, but switch to 5% BSA when detecting phosphorylated proteins (as milk contains casein, a phosphoprotein that causes high background).
- Ensure washing buffers contain 0.05–0.1% Tween-20 (TBST/PBST) and perform at least 3–4 washes of 5–10 minutes each after primary and secondary antibody incubations.
Issue: Non-Specific Bands / Cross-Reactivity
- Root Cause: High primary/secondary antibody concentration or non-specific binding.
- Optimization:
- Titrate primary antibodies (e.g., test 1:500 vs. 1:1,000 vs. 1:2,000 dilutions).
- Incubate primary antibodies overnight at 4°C with gentle shaking rather than for 1–2 hours at room temperature.
4. Signal Detection & Imaging
The final step requires choosing the right exposure and imaging modality to yield publication-ready data.
Issue: Ghost Bands or White Spots (“Burn Through”)
- Root Cause: Excess HRP enzyme activity depleting the substrate locally due to high primary/secondary antibody concentrations or high target abundance.
- Optimization:
- Reduce primary antibody concentration or load less total protein per lane.
- Use a substrate with a broader dynamic range or wash the membrane to re-incubate with diluted secondary antibody.
Issue: Saturated Signals and Narrow Dynamic Range
- Root Cause: Overexposure during CCD camera imaging or film exposure.
- Optimization:
- Capture digital images using automated exposure modes to ensure signal levels remain within the linear range for accurate densitometric quantification using software like ImageJ.
Final Thoughts
Consistent Western blotting results rely on standardizing every step of the workflow, from cell harvesting to image acquisition. Keeping detailed records of protein concentrations, gel percentages, and antibody dilutions makes identifying anomalies straightforward when troubleshooting.
